
Notification의 특징
- 사용자마 메세제를 확인하거나 제거하기 전까지 메시지를 유지합니다. (핸드폰을 껐다다 켜도..)
- 메시지를 터치하면 지정된 Activity가 실행되어 애플리케이션 실행을 유도할 있다.
FCM Message 종류
AnFirebase Cloud Messaging(FCM) 을 통해 2가지 유형의 메시지를 클라이언트에게 보낼 수 있습니다.
- 첫째 : 알림 메시지(백그라운드 수신): 종종 '표시 메시지'로 간주됩니다. FCM SDK에서 자동으로 처리합니다.
- 둘째 : 데이터 메시지(포그라운드 수신): 클라이언트 앱에서 처리합니다.
알림 메시지에는 사용자에게 표시되는 키 모음이 사전 정의되어 있습니다. 반면 데이터 메시지에는 사용자가 정의한 커스텀 키-값 쌍만 포함됩니다. 알림 메시지에 데이터 페이로드(선택사항)가 포함될 수 있습니다. 두 메시지 유형의 최대 페이로드는 4KB입니다. Firebase Console에서 메시지를 보내는 경우는 예외로 1,024자의 한도가 적용됩니다.
Android Studio 에서 셋팅 (Front end 설정)
1. 백그라운드에서 알림 수신
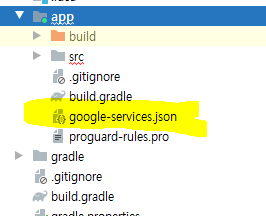
Firebase 구성 파일 추가
- google-services.json
google-services 플러그인을 Gradle 파일에 추가
- 프로젝트 수준 Gradle 파일(build.gradle)에서 Google 서비스 Gradle 플러그인을 포함하는 규칙을 추가합니다. Google의 Maven 저장소도 추가
buildscript {

  repositories {
    // Check that you have the following line (if not, add it):
    google()  // Google's Maven repository
  }

  dependencies {
    // ...

    // Add the following line:
    classpath 'com.google.gms:google-services:4.3.5'  // Google Services plugin
  }
}

allprojects {
  // ...

  repositories {
    // Check that you have the following line (if not, add it):
    google()  // Google's Maven repository
    // ...
  }
}
- 앱 수준 Gradle 파일(일반적으로 app/build.gradle)에서 Google 서비스 Gradle 플러그인을 적용
apply plugin: 'com.android.application'
// Add the following line:
apply plugin: 'com.google.gms.google-services'  // Google Services plugin

android {
  // ...
}
- 앱 수준 Gradle 파일(일반적으로 app/build.gradle)에서 Firebase 클라우드 메시징 Android 라이브러리의 종속 항목을 선언
dependencies {
    // Import the BoM for the Firebase platform
    implementation platform('com.google.firebase:firebase-bom:26.8.0')

    // Declare the dependencies for the Firebase Cloud Messaging and Analytics libraries
    // When using the BoM, you don't specify versions in Firebase library dependencies
    implementation 'com.google.firebase:firebase-messaging'
    implementation 'com.google.firebase:firebase-analytics'
}
알림 기본 디자인/ 채널 그룹설정을 위한 선택사항
<!--사용자 지정 기본 아이콘을 설정. 수신 알림 메시지에 아이콘이 설정되지 않은 경우 사용됨. -->
<meta-data
    android:name="com.google.firebase.messaging.default_notification_icon"
    android:resource="@drawable/ic_main" />
<!-- 수신 알림 메시지에 사용되는 색상을 설정.들어오는 색상이 설정되지 않았을 때 사용됨 -->
<meta-data
    android:name="com.google.firebase.messaging.default_notification_color"
    android:resource="@color/green_35" />


<!-- 기본 채널을 직접 만들어 사용하려면, default_notification_channel_id를 알림 채널 객체의 ID로 설정. -->
<meta-data
    android:name="com.google.firebase.messaging.default_notification_channel_id"
    android:value="@string/default_notification_channel_id" />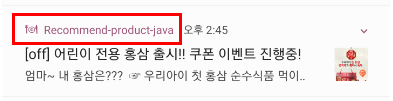
1, 2번 설정까지 완료후 콘솔에서 메시지를 보내면 백그라운드 상태인 앱에서 알림 메시지를 수신할 수 있습니다.
즉 만약 사용자가 앱을 사용하고 있는 경우에는 앱 알림을 받지 못하게되는것입니다.
포그라운드 상태인 앱에서 알림 메시지 또는 데이터 메시지를 수신하려면 onMessageReceived 콜백을 처리하는 코드를 작성해야 합니다. 다음 3, 4번을 추가해주시면 됩니다.
2. 포그라운드/백그라운드 모두 알림 수신
백그라운드에서 앱의 알림을 수신하는 것 외에 포그라운드 앱의 알림 수신, 데이터 페이로드 수신, 업스트림 메시지 전송 등을 수행하려면 FirebaseMessagingService를 상속하는 서비스를 추가해야합니다.
AndroidManifest.xml
<service
    android:name=".NotificationService"
    android:exported="false">
    <intent-filter>
        <action android:name="com.google.firebase.MESSAGING_EVENT" />
    </intent-filter>
</service>
NotificationService.java
public class NotificationService extends com.google.firebase.messaging.FirebaseMessagingService {

    @Override
    public void onNewToken(@NonNull String s) {
        super.onNewToken(s);
        Log.d("jslee314", "Token : " + s);
    }


    /**
     * @내용 : 포그라운드 상태인 앱에서 알림 메시지 또는 데이터 메시지를 수신하려면
     * onMessageReceived 콜백을 처리하는 코드를 작성해야 함
     **/
    @Override
    public void onMessageReceived(@NonNull RemoteMessage remoteMessage) {
        super.onMessageReceived(remoteMessage);

        if (remoteMessage.getNotification() != null) {
            sendNotification(remoteMessage.getNotification());

        }
    }

    private void sendNotification(RemoteMessage.Notification notification) {

        // 0. Pending Intent
        Intent notificationIntent = new Intent(this, LoadingActivity.class);
        notificationIntent.setFlags(Intent.FLAG_ACTIVITY_NEW_TASK | Intent.FLAG_ACTIVITY_CLEAR_TASK);
        PendingIntent pendingIntent = PendingIntent.getActivity(this, 0, notificationIntent, PendingIntent.FLAG_UPDATE_CURRENT);

        // 1. 알림 메시지를 관리하는 notificationManager 객체 추출
        NotificationManager notificationManager = (NotificationManager) getSystemService(Context.NOTIFICATION_SERVICE);
        NotificationCompat.Builder builder = getNotificationBuilder(notificationManager, "chennal id", "첫번째 채널입니다");

        builder.setContentTitle(notification.getTitle())       // 콘솔에서 설정한 타이틀
                .setContentText(notification.getBody())         // 콘솔에서 설정한 내용
                .setPriority(NotificationCompat.PRIORITY_DEFAULT)
                .setContentIntent(pendingIntent)// 사용자가 노티피케이션을 탭시 ResultActivity로 이동하도록 설정
                .setAutoCancel(true);             // 메시지를 터치하면 메시지가 자동으로 제거됨

        notificationManager.notify(1234, builder.build()); // 고유숫자로 노티피케이션 동작시킴
    }


    /**
     * @내용 : 안드로이드 8.0 이상부터 Notification은 채널별로 관리해야만 함
     * (channel별이라함은 Notification을 보낼때마다 막쌓이는것이 아니고 앱별로 그룹지어서 쌓이도록 하는 것 )
     **/
    protected NotificationCompat.Builder getNotificationBuilder(NotificationManager notificationManager, String channelId, CharSequence channelName) {
        NotificationCompat.Builder builder = new NotificationCompat.Builder(this, channelId);

        if (Build.VERSION.SDK_INT >= Build.VERSION_CODES.O) {

            // 2. NotificationChannel채널 객체 생성 (첫번재 인자: 관리id, 두번째 인자: 사용자에게 보여줄 채널 이름)
            NotificationChannel channel = new NotificationChannel(channelId, channelName, NotificationManager.IMPORTANCE_HIGH);
            channel.enableLights(true);
            channel.setLightColor(Color.RED);
            channel.enableVibration(true);

            // 3. 알림 메시지를 관리하는 객체에 노티피케이션 채널을 등록
            notificationManager.createNotificationChannel(channel);
            builder.setSmallIcon(R.drawable.ic_launcher_foreground); //mipmap 사용시 Oreo 이상에서 시스템 UI 에러남
            return builder;

        } else { // Oreo 이하에서 mipmap 사용하지 않으면 Couldn't create icon: StatusBarIcon 에러남
            builder.setSmallIcon(R.mipmap.ic_launcher);
            return builder;

        }

    }
}
FirebaseMessagingService을 상속받은 NotificationService 클래스를 만들어
Notification의 구체적인 부가기능(포그라운드 앱의 알림 수신, 데이터 페이로드 수신, 업스트림 메시지 전송 등)을 구현할수 있습니다.
이제 어플리케이션 사이드에서 해야할일을 마쳤습니다.
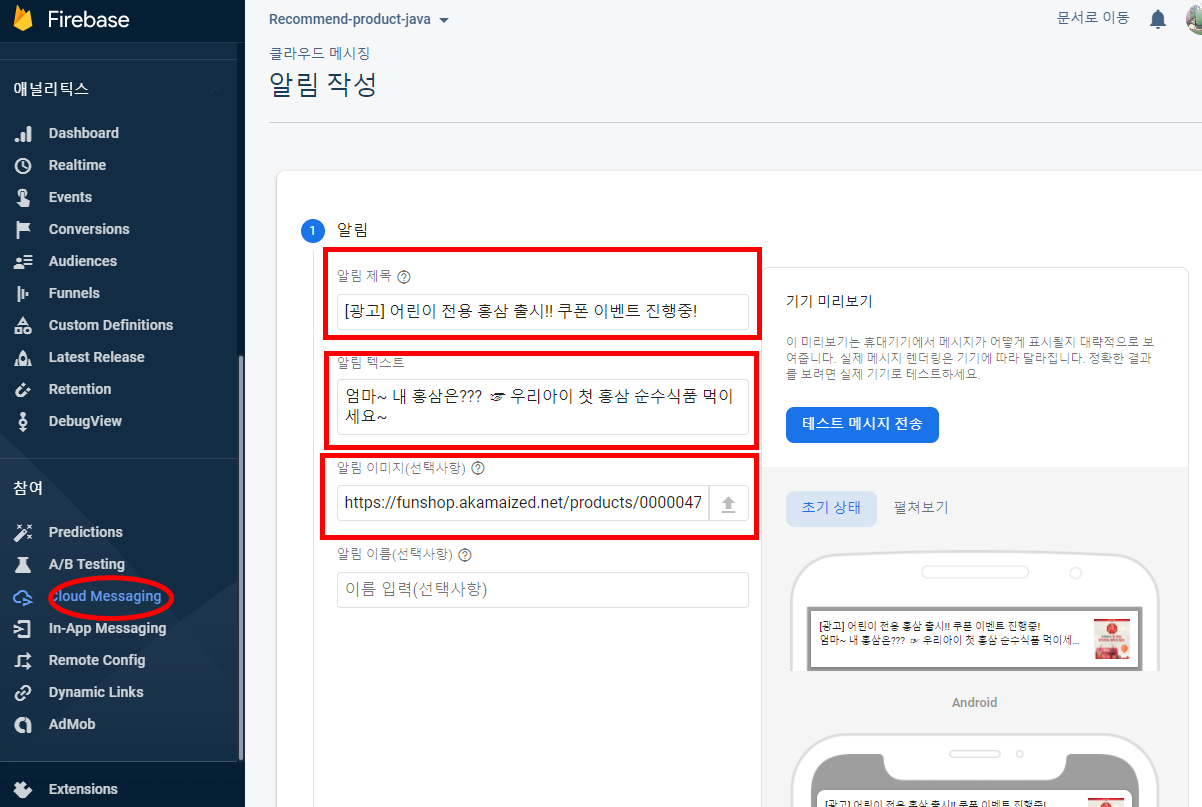
그럼 이제 파이어베이스 콘솔로 가서 메시지 작성을 하도록 하겠습니다.
콘솔에서 셋팅 (Back end)
파이어베이스 기본설정
Firebase에 앱 등록 과정은 생략하겠습니다.
Cloud Messaging
결과
그런데
백그라운드 결과는 이렇게 나오는데
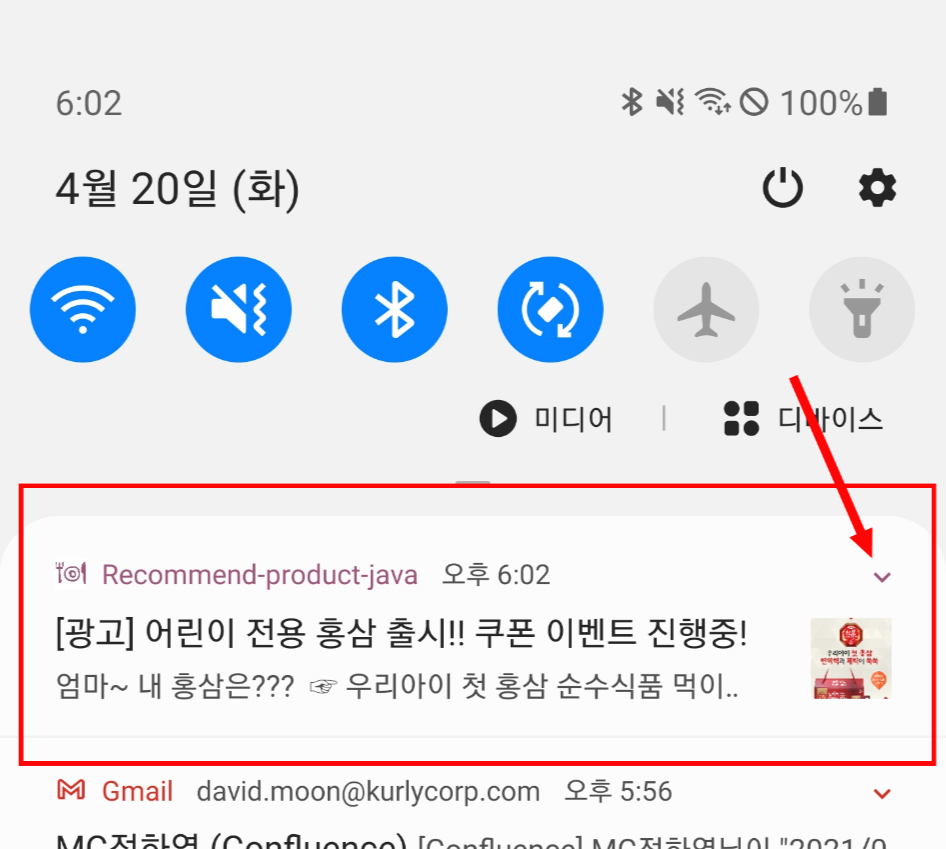
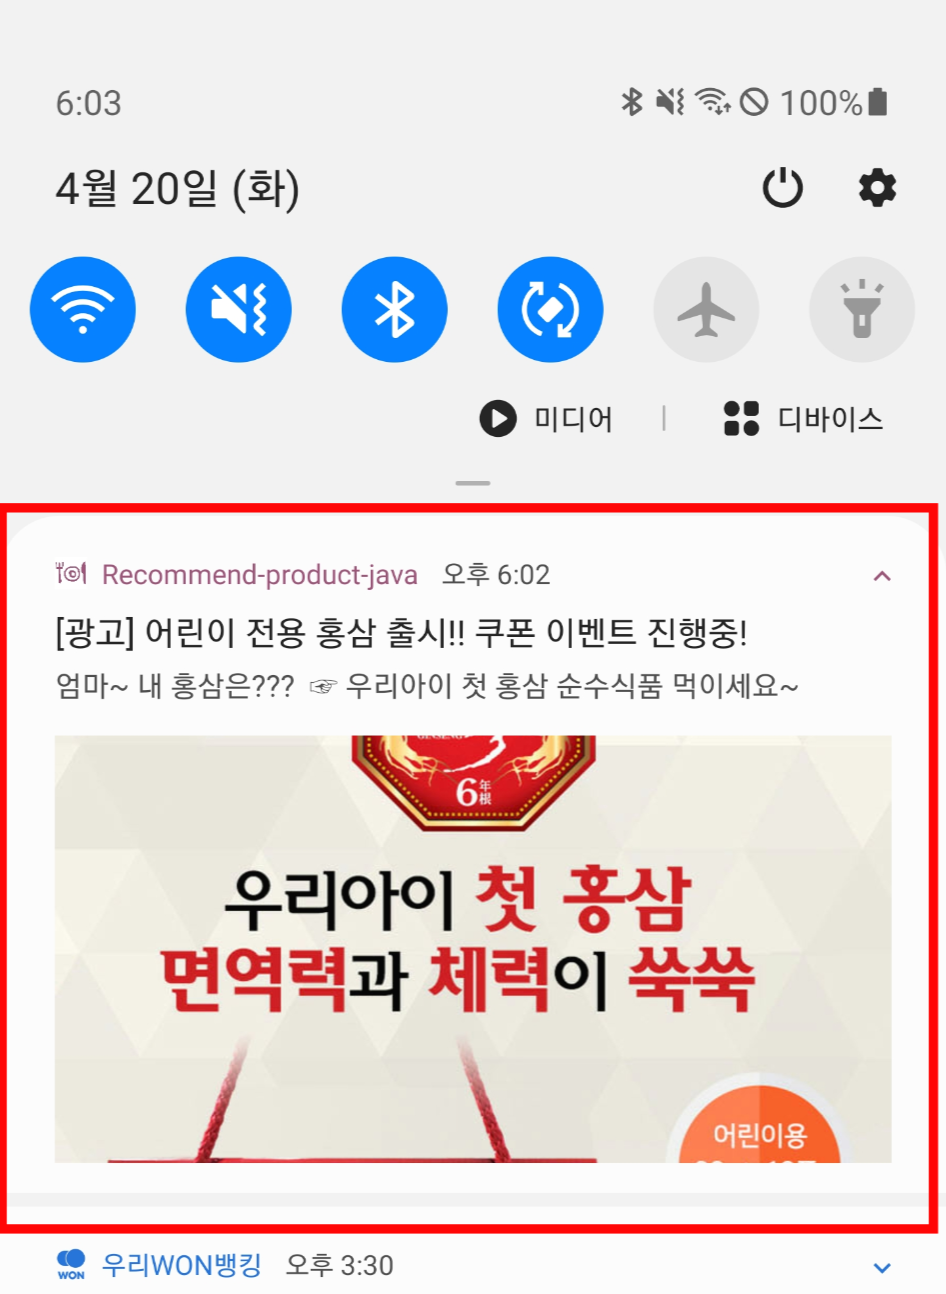
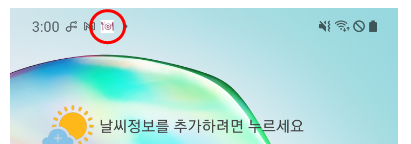
포그라운드 결과는 다음 아래와 같이 나오는 것을 확인하였습니다. 이미지가 나오지 않고 제목과 텍스트만 전달된 형태로 나옵니다.
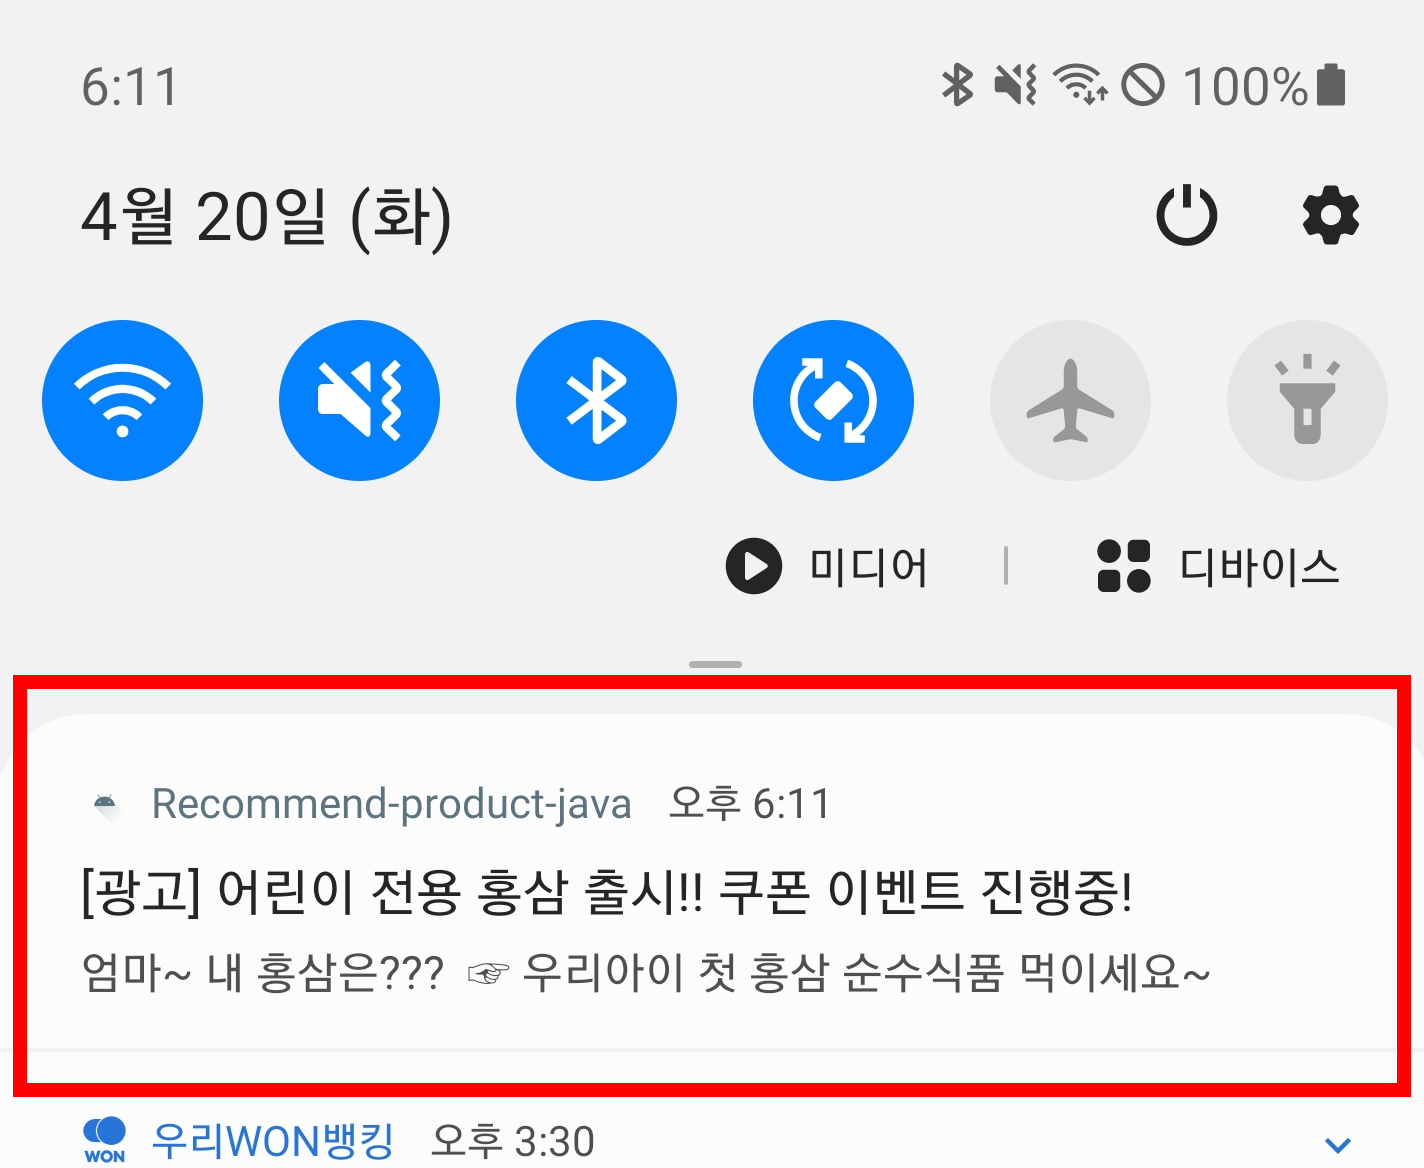
이유가 뭘까요? 그 이유는 앞에서 설명한데로
파이어베이스 콘솔(Backend)에서 설정된 이미지 등은 백그라운드 실행시 적용되는것이고
포그라운드에서는 안드로이드 소스로 구현한 기능이 실행되기때문입니다.
즉 파이어베이스 콘솔에서 설정한 정보들을
고대로
안드로이드 소스로 적용해주어야합니다.
그 전에 타이틀과 내용 외에 어떤 정보를 받아오는지 디버그 모드로 돌려보았다.
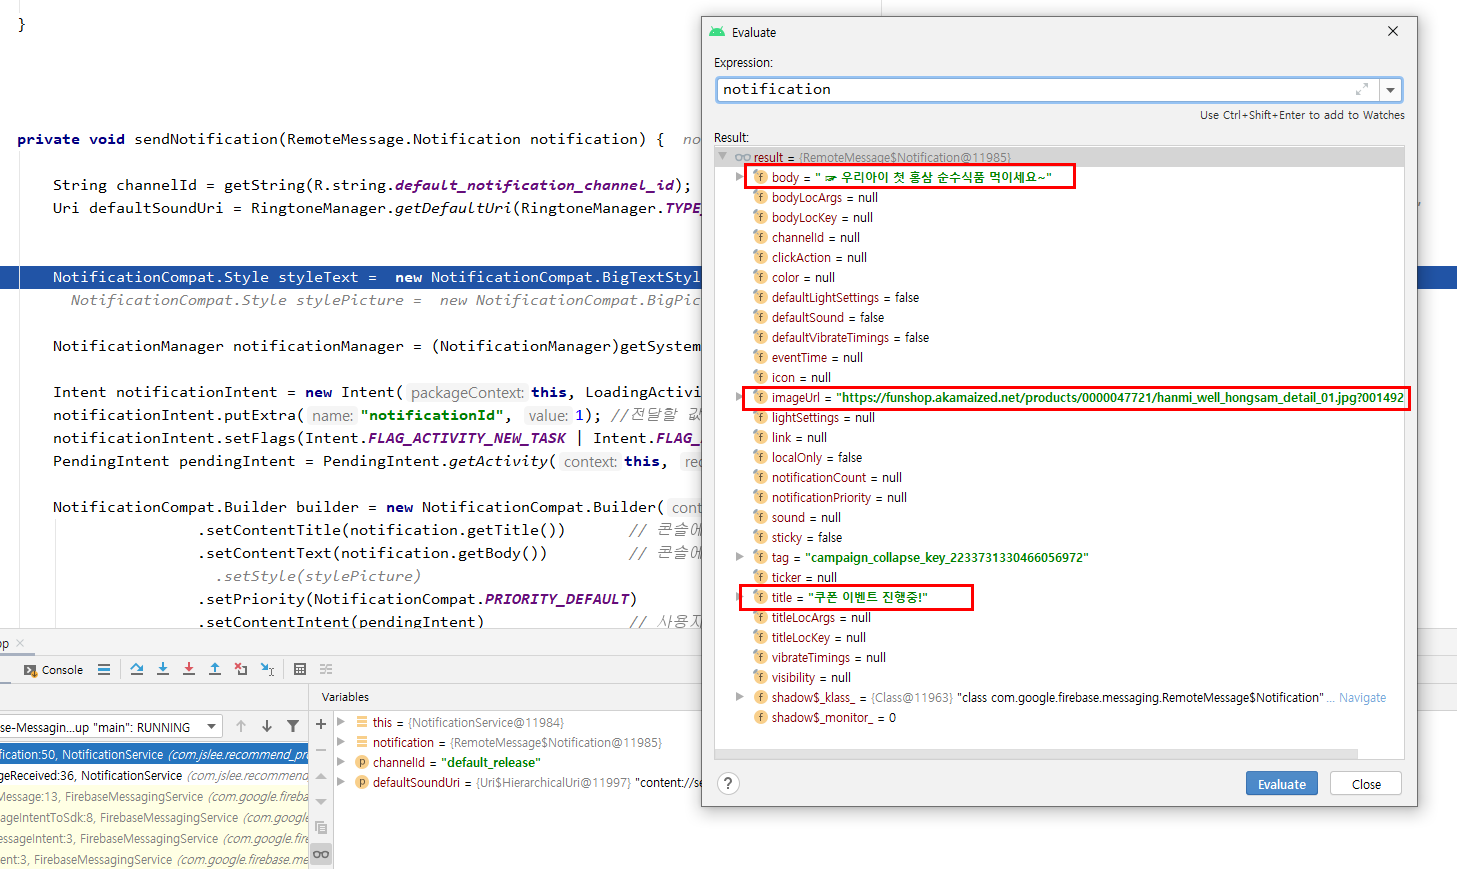
title, body 외에 imageUrl 에 이미지 정보가 담겨져 오는것을 확인할 수 있었습니다.
이제 이미지를 적용하기위해 확장된 Notification을 구현하러가볼까요~?
확장 notification 구현
NotificationService.java
public class NotificationService extends com.google.firebase.messaging.FirebaseMessagingService {

    private Bitmap bmp = null;
    OkHttpClient client = new OkHttpClient();

    @Override
    public void onNewToken(@NonNull String s) {
        super.onNewToken(s);
        Log.d("jjslee", "Token : " + s);
    }

    /**
     * @내용 : 포그라운드 상태인 앱에서 알림 메시지 또는 데이터 메시지를 수신하려면
     * onMessageReceived 콜백을 처리하는 코드를 작성해야 함
     **/
    @Override
    public void onMessageReceived(@NonNull RemoteMessage remoteMessage) {
        super.onMessageReceived(remoteMessage);

        if (remoteMessage.getNotification() != null) {
            sendNotification(remoteMessage.getNotification());
        }
    }
    /**
     * @내용 : 파이어베이스 remoteMessage를 통해 받은 url로 이미지 값 가져와 비트맵으로 변환하는 함수
     *         okhttp 라이브러리를 사용해서 Get 요청 동기처리
     *         이미지를 받아오는데 실패했을 경우 false 반환
     **/
    public boolean getImage(Uri string){

        try {
            // GET 요청을 Request.Builder 를 통해 만듦 (get 요청임을 명시)
            Request request = new Request.Builder().url(String.valueOf(string)).get().build();

            // client 객체의 newCall() 메소드에 만들어진 Request를 전달하고, execute() 메소드를 실행
            Response response = client.newCall(request).execute();

            // execute() 메소드는 요청에 대한 응답이 올때까지 기다렸다가 반환
            if (response.isSuccessful()) {
                ResponseBody body = response.body();
                if (body != null) {
                    ResponseBody in = response.body();
                    InputStream inputStream = in.byteStream();
                    BufferedInputStream bufferedInputStream = new BufferedInputStream(inputStream);
                    bmp=BitmapFactory.decodeStream(bufferedInputStream);
                    Log.d("jjslee","bitmap value = "+bmp.toString());
                }
            }
            return true;
        } catch(Exception e) {
            return false;
        }

    }
    private void sendNotification(RemoteMessage.Notification notification) {

        // 0. Pending Intent
        Intent notificationIntent = new Intent(this, LoadingActivity.class);
        notificationIntent.setFlags(Intent.FLAG_ACTIVITY_NEW_TASK | Intent.FLAG_ACTIVITY_CLEAR_TASK) ;
        PendingIntent pendingIntent = PendingIntent.getActivity(this, 0, notificationIntent,  PendingIntent.FLAG_UPDATE_CURRENT);

        // 1. 알림 메시지를 관리하는 notificationManager 객체 추출
        NotificationManager notificationManager = (NotificationManager)getSystemService(Context.NOTIFICATION_SERVICE);
        NotificationCompat.Builder builder = getNotificationBuilder(notificationManager, "chennal id", "첫번째 채널입니다");

        builder.setContentTitle(notification.getTitle())       // 콘솔에서 설정한 타이틀
                .setContentText(notification.getBody())         // 콘솔에서 설정한 내용
                .setSmallIcon(R.drawable.ic_main)
                .setColor(getResources().getColor(R.color.green_35))
                .setPriority(NotificationCompat.PRIORITY_DEFAULT)
                .setContentIntent(pendingIntent)// 사용자가 노티피케이션을 탭시 ResultActivity로 이동하도록 설정
                .setAutoCancel(true);             // 메시지를 터치하면 메시지가 자동으로 제거됨

        // 이미지를 성공적으로 받아와졌을때만 수행
        if(getImage(notification.getImageUrl())){
            builder.setLargeIcon(bmp)
                    .setStyle(new NotificationCompat.BigPictureStyle()
                            .bigPicture(bmp)
                            .bigLargeIcon(null));
        }

        notificationManager.notify(1234, builder.build()); // 고유숫자로 노티피케이션 동작시킴

        if (bmp != null) {
            bmp.recycle();
            bmp = null;
        }

    }

    /**
     * @내용 : 안드로이드 8.0 이상부터 Notification은 채널별로 관리해야만 함
     * (channel별이라함은 Notification을 보낼때마다 막쌓이는것이 아니고 앱별로 그룹지어서 쌓이도록 하는 것 )
     **/
    protected NotificationCompat.Builder getNotificationBuilder(NotificationManager notificationManager, String channelId, CharSequence channelName) {
        NotificationCompat.Builder builder = new NotificationCompat.Builder(this, channelId);

        if (Build.VERSION.SDK_INT >= Build.VERSION_CODES.O) {

            // 2. NotificationChannel채널 객체 생성 (첫번재 인자: 관리id, 두번째 인자: 사용자에게 보여줄 채널 이름)
            NotificationChannel channel = new NotificationChannel(channelId, channelName, NotificationManager.IMPORTANCE_HIGH);
            channel.enableLights(true);
            channel.setLightColor(Color.RED);
            channel.enableVibration(true);

            // 3. 알림 메시지를 관리하는 객체에 노티피케이션 채널을 등록
            notificationManager.createNotificationChannel(channel);
            builder.setSmallIcon(R.drawable.ic_launcher_foreground); //mipmap 사용시 Oreo 이상에서 시스템 UI 에러남
            return builder;

        } else { // Oreo 이하에서 mipmap 사용하지 않으면 Couldn't create icon: StatusBarIcon 에러남
            builder.setSmallIcon(R.mipmap.ic_launcher);
            return builder;

        }
    }
}
이제 백그라운드에서, 포그라운드에서 모두 알림이 잘 나오는 것을 확인할 수 있었습니다~

'Android > Firebase' 카테고리의 다른 글
| Firebase Remote Config(파이어베이스 원격 구성) 구현하기 (0) | 2021.04.08 |
|---|---|
| Firebase Crashlytics (파이어베이스 크래시리틱스) 구현하기 (0) | 2021.04.08 |
| Firebase Cloud storage (파이어베이스 클라우드 저장소) 구현하기 (0) | 2021.04.08 |
| Firebase Authentication ( 파이어베이스 인증) 구현하기 (0) | 2021.04.08 |
| firebase 시작하기 (docs) (0) | 2020.11.21 |